Tuesday, May 31, 2011

Bathroom Reno: The Fixtures & Final Touches

Well we have gotten through the bulk of the difficult process.  The next part was to add the toilet, add the sink & put up the finishing touches.

We got a new Kohler toilet (YAY) which was actually pretty easy to install.  With the new flange down, we put on the wax ring, put on the washers and stuck the thing down.  Matt sat on it and tightened the bolts to the floor.  It is a 2-piece toilet, so next we had to add the back.  Luckily the tank came with all of it's guts included (which is the hardest part about putting together a toilet), so we just had to put it on, level the tank, tighten the bolts & start the water.  Putting the toilet in might have been the easiest part of the job.

See, no way to see the tile that was cut in half now!

We got a pedestal sink, which we actually took into the dining room to assemble so that we would have more room.  We used plumbers putty to put in the drain, we attached the faucet, and all the guts of the sink in the other room.  We put the sink on the base, which we just set upright in front of the waste pipe.  Turns out that the pipe was too short, so we had to run back to the hardware store to get some extra PVC.

The most difficult part was tightening the screws to attach it to the wall.  There was no real way of knowing exactly how long of anchors to put in the wall.  So we guessed, and the odds are that we probably should have gotten longer ones, regardless, we installed the sink in a couple hours.  We added a mirror & a shade to complete the look.  However, one of my favorite parts was the shelf that my wonderful husband built over the toilet.

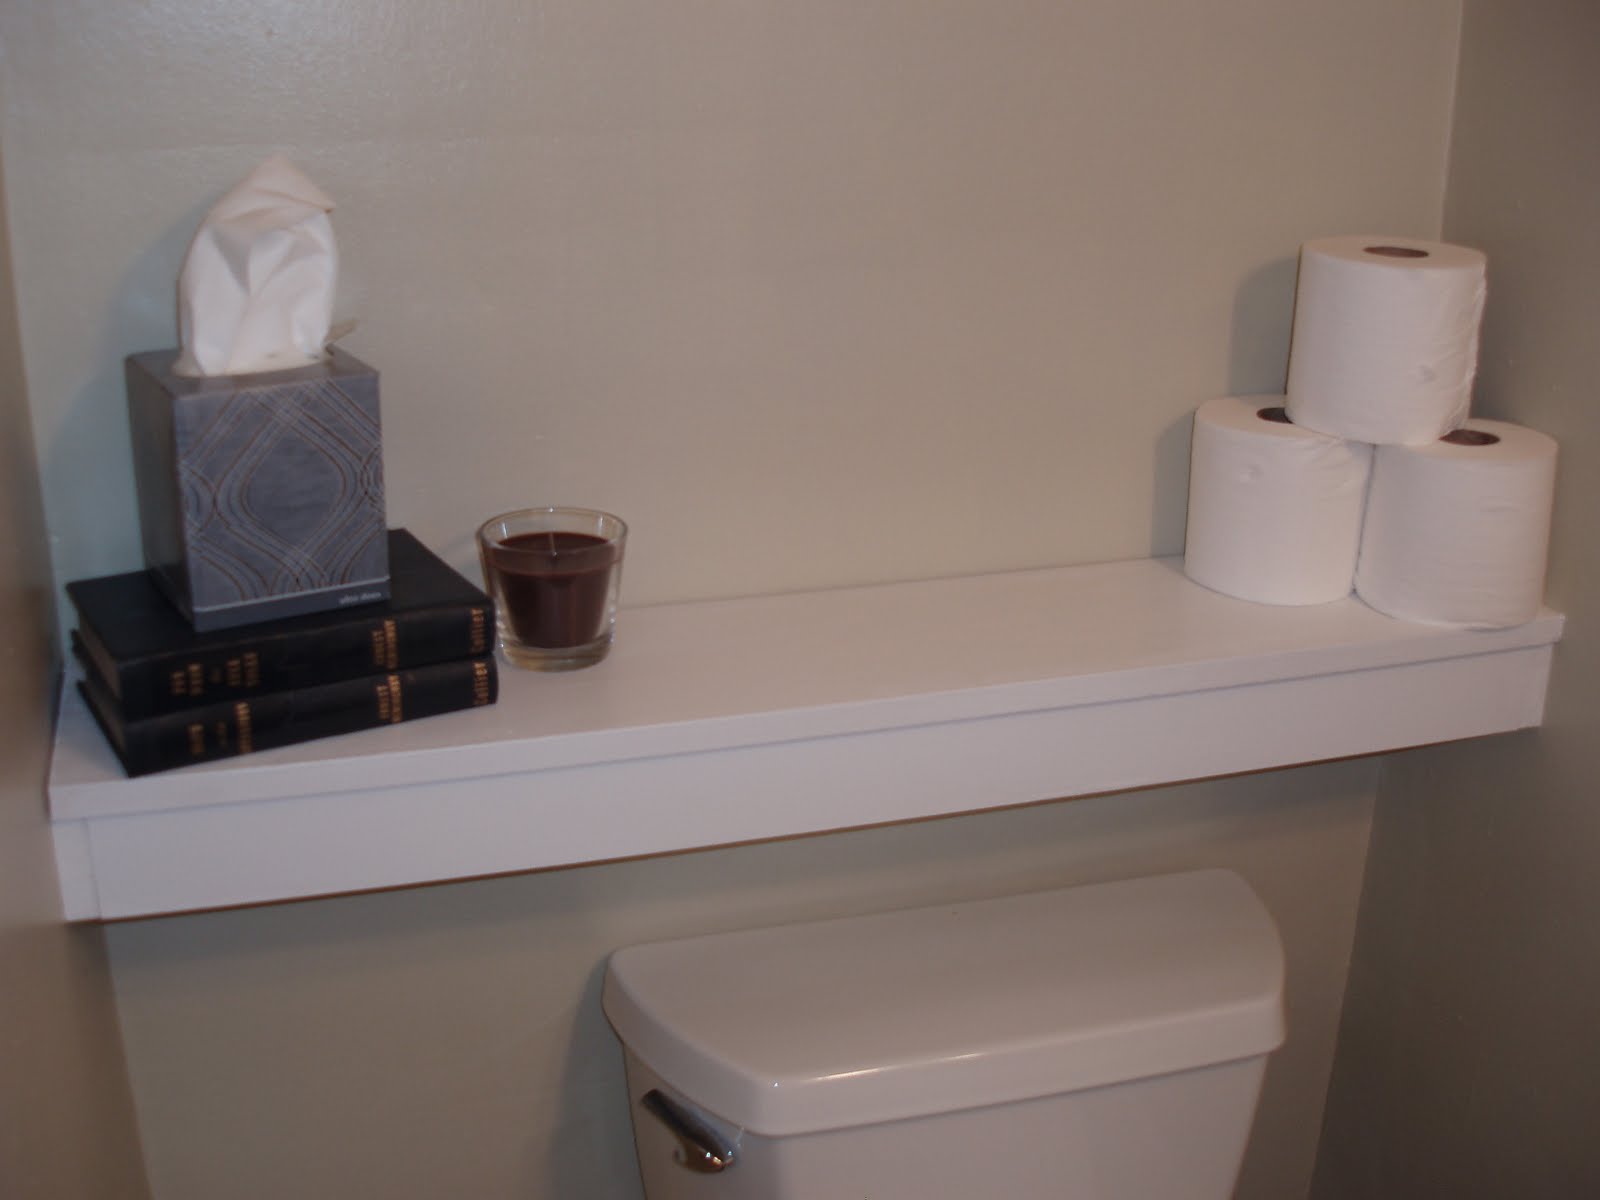
Because we had removed all the storage in the room by taking out the medicine cabinet & the vanity, we needed a shelf to put things on.  So Matt put up three sides on the wall, permanently with screws, countersunk & filled with wood glue.  He then made an L-shaped shelf that slid in to the three sides perfectly.  This shelf can be removed easily to work on the toilet if need be.  He painted and primed the shelf.

And without further ado, here is our bathroom, in all of it's glory:


Okay, so there are still a few things to do.  We need to touch up the paint, paint the ceiling, add a shoe mold to the baseboard to cover up the gap between the tile & the baseboard.  I'd like to paint the door, adding a nice dark grey accent to compliment the room.

I'm currently working on some wall art for over the toilet.  I'm waiting to get a great wicker box to keep some toiletries in, so that they don't have to just sit on the shelf.  We also have an issue at the threshold that we are still trying to figure out.

All of this will happen later.  For now the bathroom is done, functional, and not something we have to pine over every day.  And we LOVE it!!!  What do you guys think?

If you haven't caught the posts that lead up to this, check out the following links:  Demo Day, The Reconstruction, and A World of Tiling

Thanks for reading, hope you love what you see!

Monday, May 30, 2011

Bathroom Reno: A World of Tiling

We left off with a room that had new baseboards, a new light fixture, paint & a panel of Hardie Board on the floor.  The problem that we encountered for the next few weeks, was that everything we put down on the floor required 24 hours to dry, before we could do anything else.  So since the Hardie Board was down, we could begin tiling.

We started with a pattern.  Because the room was small, we didn't have a lot of options.  We could either put a single row down the middle with 3/4 tiles surrounding the full ones, or a double row of full tiles down the middle with a 1/4 tile around the border.  Because nothing in the room was centered, we selected to put in as many large tiles as we could, selecting the two down the middle pattern.

Putting down square or straight cut tile was fairly easy.  For the straight cuts, we used a tile cutter, a tool that looked like this:

I questioned whether this would actually work, as it was just a little wheel that scores the tile with a flat plate, that when pushed down, cracked the tile along the score line.  Much to my amazement, it worked perfectly, and I would recommend picking one of these up.  Much less mess than a wet saw, and very quick to work.

So we started by laying the full tiles.  The hardest part is to get them level in a room that isn't flat.  Matt did most of this work on his days off, as the room is not big enough for two people to be working in at the same time.  Then we did the 1/4 tiles around the perimeter.  Because the home is old and the room is not square, we had to get a little fancy with cutting the tiles.

We used 1/8" spacers, to give the grout a thin and more modern look. 

Now for the hard part, CUTTING THROUGH PORCELAIN TILE!!!  This is maybe the most frustrating thing that we have ever done in our lives...  We sought out lots of advice from friends and home improvement helpers alike, all with different opinions, so we'll tell you what worked best for us.

We started with the easiest of the cuts.  We had a small square cut that needed to be cut around the water pipe for the toilet.  One person had suggested using the same jigsaw blade that we had used to cut through the hardie board with.  It essentially looks like a nail file for a jigsaw.  It worked great in the hardie board, unfortunately, not so well in the tile.  Half way through the straight cut, the blade kinked, jumped and bent in half.  At $10 a blade, that was the end of that experiment.  We finished the cut with the tile cutter, working very carefully.

Next we started with the second most complicated hole... the round hole for the toilet.  One person suggested using a concrete bit for the drill, to drill through the tile, then to use the jigsaw to cut the circle.  Well we knew how well that was working, but we were going to try it.  It just so worked out that the hole for the toilet was right in the middle of a tile.  Well, first shot with the new $15 drill bit, and crack, the tile split in half.  Not to mention that the tip of the drill bit had melted from the work it was doing.... this was NOT the way to cut this hole.

So we went with the next piece of advice we had heard.  We cut the tile right down the middle of the hole with the tile cutter, so that half of the waste hole was in each half.  We would set the tile back together and grout the crack so that it wouldn't be noticed (you can see this in the finished photo at the bottom.  In fact the whole thing was going to be under the toilet, so it wouldn't be noticed anyways.  We then used a wet saw to make dozens of straight cuts into the tile to make the shape of the circle, like this:


We then used a pair of tile nippers that look like this, to "snip" off the tile into a nice circular pattern:


You put the flat ends on the tile and "snip" off the tile.  Definitely read up before using these, you aren't supposed to really "nip" at the tile, you are supposed to grab and apply pressure to snap it, not really biting at the tile.  This actually worked great to get the hole done.

The next set of holes was going to prove to be the most difficult.  You see, when you put down the toilet, you need to put down a new toilet flange.  Well you have to screw the new flange down through this tile, so you need to cut 6, yes SIX small holes through the tile, in very VERY close proximity to the big waste hole to accomplish this.

Well we had purchased a masonry tip, but after our last experience we knew that it wouldn't work, so we went back to the hardware store and purchased a diamond tip drill bit.  This was specifically for glass and tile.

Matt started the drilling and after about 10 minutes on the first hole, crack, the corner of the tile split off.  We decided that it was a split that we could deal with so he went on to the next hole.  He eased up on the pressure, and had kept a wet sponge next to the drill bit.  The second hole went all the way through after about 15 minutes.  However, the third hole split the tile in half...  Almost an entire day of drilling and another tile was ruined.


These tools were exactly what we needed, and after about 5 minutes per hole, the job was complete... frustration be... well you know what.  We then cut and put down the rest of the tile pieces.

After everything dried the appropriate amount of time, we grouted the tile.  Grouting was fairly easy, it's really just shoving grout into the voids between the tile, and wiping the excess off.  And for the finished product, here you go:


You can see the line down the middle of the waste hole and the six smaller holes around it, boy was this job way more complicated than we anticipated for this size room, but man did it look amazing compared to the carpet that was there before!  Whew.. another job done, and another post done.

To see how we got to this point check out the following posts:  Bathroom Reno: Demo Day & Bathroom Reno: The Reconstruction

Saturday, May 28, 2011

Bathroom Reno: The Reconstruction Begins

We left off yesterday with a totally destroyed 91 year old half bathroom.  We slept like rocks, and then it was off to Home Depot to pick up some supplies that we couldn't have predicted we would have needed.  I went to pick up some flat 1x6 and profiled trim to fix the baseboard while my husband got a little more shut eye.

While I was there, I picked up some finishing nails and actually had to purchase chair rail to find something tall and wide enough to replace the missing molding.  If you remember, the wall area looked like this when we were done with the demolition:


You can see the missing baseboard and the missing molding in the photo above.  We don't have a compound miter saw, so we had to improvise with the tools required to cut the molding at a 45 degree angle.  We used a jigsaw & eyeballed it.  Luckily there was caulk and wood glue to fill in any gaps.... or at least that's what we thought.

Three of the walls proved to be fairly simple to fix, even the place where the flat board was missing.  We did have to chisel out a bit of baseboard that was below the plywood floor to slip in the new flat board, but that wasn't our biggest issue - it was the 4th wall, the one behind the toilet, the one that we haven't completely finalized yet.  The plaster on all walls ended about 1/4" below the molding.  In most places this wasn't an issue, but on the 4th wall, the lath was about 1-1/2" away from the face of the plaster.  Here is a photo using my finger as a guide:


Please notice that you can't see my first knuckle.  That's how far away the wall was, and because the chair molding that we got was actually 1/4" shorter than the molding that was there, there would be nothing to support the new molding with.  There was also nothing to nail it into.

So what we planned on doing was nailing the trim to the flat board beneath it, then just caulking the joint.  Again, on three walls, this worked perfectly.  The fourth wall was NOT pretty, and still is only partially fixed.  What we will eventually do is to place a thin board along the wall and paint it to match the wall so that any larger gaps will be covered.

So it took a while to get the old wood chiseled, the new wood cut, the molding cut at an angle with the wrong tools, and nailing straight down with a large hammer on profiled wood.  In fact it took us the whole day, when you include caulking and adding wood glue.   Here is the photo after the new baseboards were installed.


We added caulking in the floor holes, patched messed up plaster and even installed the light fixture with the rest of that day. The next day was a Monday, so we only had a few hours after work to do some work. So we threw down thin set, and put the Hardie Board into place, screwing it down at 8" on center.  Here is a photo of the Hardie Board in place:


We had to buy a fancy bit for the jigsaw to cut the holes in the Hardie Board, as it is a cementitious material.  Just a little heads up, cutting circles is difficult.  Turns out that the can of french fried onions on our shelf was the exact same diameter as the waste pipe, so that's what we used to draw the circle.  Then Matt cut a straight line in the board down to the circle and slowly cut out a circle.  He had to take a second pass to make it a little wider, but it fit perfectly.

Matt was busy the next few days, so I painted the baseboards, primed and painted the walls, and finished with any wall repairs.  See the gap in the back wall in the photo above, most of that was able to be patched, some wasn't, but it's behind the toilet, so any "patch" has been delayed.

So that was the beginning of putting things back together.  Next step:  Tiling.... another post that is not to be missed.  Hopefully it will be full of little tips to help you to get through it better than we did!!

Friday, May 27, 2011

Bathroom Reno: Demo Day

Ladies and Gentlemen!  We are back!!!

The half bathroom is about 85% finished, but it's done enough to give you all an update on the progress of the room.

Just for a refresher, you should remember the bathroom looking like this:


Please note the old vanity, the medicine cabinet, and the horrible carpet on the floor.  But those are only the immediate things that you will notice.  What you can't see is a crack in the toilet, from the floor to the top of the bowl.  You can't see awful plastic blinds on the window, or the 1970's era light fixture above the medicine cabinet.  This room needed to be fixed, immediately.  So after what was literally YEARS of planning, we shut down the bathroom and started the renovation.

And because the first morning was crazy and not many photos were taken, after about 6 hours at least as many trips to the home improvement store, the same wall looked like this:


Now don't let the fact that the room doesn't look that different, deceive you.  There aren't a TON of pictures that came from the disaster that we will refer to as "Demo Day".  However, this day alone will occupy an entire post.

We begin this story first thing in the morning.  We went once to Lowe's to purchase the light fixture, then to Home Depot to get various building supplies:  Hardie Board, thinset, grout, tile spacers, etc...  Then we headed back home to start the demolition.  Luckily we had another toilet in our home, because this project ended up taking WAY longer than either one of us had planned.  We thought we could finish it in a week or two, but with work, school, final exams, it ended up taking us a month to get to the 85% mark, where we are today.

Our first job was to remove the sink, the area that you see in the photo above.  Only it wasn't as easy as one would think.  You think, turn off the water, cut the sealant, unhook the supply and waste lines and remove the vanity... HA, if only it were that easy.  We attempted to turn the knobs to the water shut offs.  The hot turned off immediately, however the cold, wouldn't turn.  So my loving husband grabbed a pair of pliers, turned the knob, and then crack... the knob broke.  So off to our local hardware store, where we purchased two new valves. 

We got home, turned off the hot and cold supplies to the bathroom, removed the hot water valve, then the cold water valve... however the water wasn't off.  How this happened I still don't know.  So I went running into the basement to turn off the main water supply.  When we went to put the new valves on, they didn't fit, so back to the hardware store we went.  He supplied us with a couple parts that he thought would fix the problem.  We got back home, and nope, that didn't help.  So we brought the old valve and one of the new valves back to the local hardware store. 

They directed us to the valves that we did want - and if you are keeping track, this was trip number 5 to various hardware stores that morning.  While we were there I also picked up two escutcheon plates to fit around the pipes so that you wouldn't see the abused plaster.  Unfortunately, i had not brought back all of the original parts, so that meant that trip number 6 would be occurring later, regardless.

Luckily, these valves worked.  It took a lot of work to get them to attach correctly, and to keep the water from leaking everywhere... but eventually it was done.  We could now remove the supply lines.  Then we unattached the waste line, and attempted to remove the sink.  First we noticed that there were two screws that were holding the sink into the wall, so after contorting ourselves to remove them, we again tried to remove the sink, to no avail.  We rocked it back and forth, cutting at sealant that we thought we were through, just trying to find where it was still attached.

We finally realized that some genius had cut part of the baseboard to fit the vanity in, not all of the baseboard, just some of it, and then screwed the bottom of the vanity into the side of the baseboard that was left.  Without an image, it's hard to show, and I'm sorry, but at the end of the day, it took us HOURS to remove the sink. 

We, quite easily and quickly, after that removed the toilet, the carpet, and the remnants of vinyl flooring that was left under the carpet.  We cut the rest of the hacked up baseboard that was left behind the vanity, and Viola!  You have the photo above. 

Because the baseboard was in two parts, a flat board and a profiled one, and the top part was impossible to match where it had been removed, we had to remove all of the top piece of baseboard, and tried to salvage what was left of the bottom piece.  Here is another photo of the "toilet remains", and showing the missing piece of molding.


The plywood that was left was in decent condition, so we worked with what we had.  That plywood actually sat on top of the original hardwood floor, so the bottom of the baseboards were actually hidden beneath the plywood.  Luckily they were very tall, so there was no need to go back to the original floor.

Also, interesting fact, if you look back at the first demo picture, you can see two small holes in the floor, any idea what they are?  I knew immediately.  I had always questioned whether this TINY little room was always a bathroom and those two little holes confirmed it for me.  It was always a bathroom, with a tiny corner sink.  The two holes were for the water pipes coming up through the floor.  I have seen this around my neighborhood before, so that's why I knew right away.

So, while demo was exhausting that day, it was just as exhausting recounting it all for you here this evening.  So I will end the post there, and start with the reconstruction soon.  Before you know it, you'll see the bathroom completed.  Hopefully you enjoy the process more than we did!!!

Tuesday, May 3, 2011

Simple Wedding Flowers

The bathroom is getting closer to being completed... It is tiling, grouting & fixture-ing away from being functional again & as soon as it's done, the recaps will begin.  Until then, we will continue to spend our evenings working on the room!  We are hoping to get most of the tiling done tonight.  Finish tiling and grouting tomorrow, then start to add the fixtures this weekend.  Maybe a toilet Friday night & a sink Saturday night?  We'll see!!!

But because I am bored at work today, I do have time to do a quick post.  Because I am still in love with all things involved with the Royal Wedding, I figured I might do a bit of a wedding post today - one based on flowers.  It is May, and wedding season is in full bloom (pun totally intended), so it makes sense to bring back some wedding information.

One thing that I found extremely refreshing with the Royal Wedding was the simplicity of the florals.  While there were enormous trees & large ferns, the flowers were simple & white.  Cathrine carried a simple bouquet filled with lily of the valley.  Her attendants had small bouquets and baskets filled with the same flower, and it made a simple, yet beautiful impact.

Hugo Burnand/AP Photo

I remember being overwhelmed by the cost of flowers, and though we did go fairly simple with our flowers, using seasonal florals in white and green, we still spent over $1,000 on flowers.  Small centerpieces, simple bouquets & boutonnieres, still over a grand in flowers.  So Cathrine's simple bouquet got me thinking... maybe we (as brides) spend too much money, and time worrying on our flowers.

Some of the most beautiful flower arrangements I have seen are simple, so I thought I'd gather some here for everyone to see.  Sometimes leaving flowers out completely is not something a bride wants to do, myself included, so here are a couple interesting solutions for a wedding bouquet.  These solutions still make an impact, but won't break your budget:


This is a simple bouquet that could be carried by the bride
or the bridesmaids.  Add color as needed!
Photo Credit: Link

A few tiered roses with some greenery is simple and beautiful. 
Adding a wide ribbon brings extra color and texture to the mix.
Photo Credit: Link

This bouquet is modern, simple & unique.
Photo Credit: Link

A few simple Calla Lilies make a dramatic impact.  Make them red, orange,
almost any color really, to match your theme.
Photo Credit: Link

Even a simple bouquet of lavender can be made into a beautiful bouquet.
If purple is in your theme, consider this!
Photo: Project Wedding

One of my favorites is baby's breath.  This is an amazing bouquet for anyone
in your wedding party.  If you want the bride to have a bigger impact, have her
 carry a bouquet of white roses to set her apart!
Photo: Project Wedding


I know I have discussed alternate wedding centerpieces here before, but I want to try to add some examples of simple centerpieces that DO use flowers.  Our centerpieces used 2-3 large hydrangea and greenery in black vases to make an impact.  As much as I LOVED the look of a big ball of beautiful flowers, adding different types of greenery can make a beautiful effect with a much lower price tag.

When we had our wedding, hydrangeas were about $5.00 each, with greenery the
centerpieces were $12-$18.  I got the vases online for $5.00 each.

Using three different vases, and simple submerged flowers, this centerpiece
is simple but dramatic.
Photo: Project Wedding
 
More unique greenery in long stalks is beautiful in this centerpiece.
Photo:  Project Wedding

Another place where simple baby's breath can make a beautiful arrangement.
Photo: Project Wedding

One bloom in lots of different vases is a great alternative.  Throw in a
couple bottles with stems of your favorite greenery & you have a great display.
Photo: Good Housekeeping
 The most important lessons when trying to lighten your floral bill are as follows:

1.  Choose flowers that are in season.  This is very important, as flowers that are not in season can run you $5-$8 each.  Trying to get a peony in August, you are going to pay for it.  There are lots of websites that can direct you to good in-season flowers.

2.  Cut back on the size and number of flowers.  While you think that every table arrangement should have 20 roses, that can run you $75 each - minimum.  Add two shorter vases with floating candles & wrapped in twine or with submerged banana leaves and go with a smaller display.  When it comes to your bouquets, if you want to have the bridal bouquet be large and in-charge, fine, but scale back on the 'maids.  A simple bouquet will be beautiful for them and will save you major money!

3. Submerge.  One flower, candle & add water - it is still dramatic, and much more cost effective than a dozen of your favorite flower.  Consult with a florist to find the best flowers for submerging.

4.  Add Greenery.  I was against this, and I wish I had done more research, but there are some beautiful greenery items that can be added to your bouquets and arrangement.  Cabbage, Kale, all kinds of interesting vegetables can be added too.

Hopefully some of these hints and photos will help you brides out there who still want flowers, but don't want to spend a small fortune decorating.  Happy Wedding Season!