I've said it before & I'll say it again - it's time to get back to work on our house. Winter is over, and the lists have begun. A few things have gotten accomplished, and a few previous plans will be back underway. This winter, we added an extra shelf in our coat closet, we got a new dishwasher, a "new" shelving unit in our hallway & more. I'll upload photos soon with details.
I decided to start with a fresh look for the blog for 2012 & hopefully a fresh outlook on our home - making it wonderful and comfortable for us.
All starts with a trip to IKEA, and we'll go from there. Our projects will begin this spring, with a makeover on the second floor of our home. It's time to find another way to store our clothes so that we can make room for an extra bedroom. Our third bedroom has been our closet for nearly 5 years now, and eventually, we'll want to think about having another resident in our home - and we will be needing that bedroom! Not anytime soon, but we might as well get started with the projects! We have clothes to move, carpet to remove, walls to paint, and so much more. And the funny thing is, I'm really really looking forward to it!
This summer we will work on the outside of our house, and get some much needed window repairs, and continue to make the inside something we love.
I'll be sure to check in and start updating again soon - this time I really do promise. I'll bring the camera with me to IKEA, always good for a few photos!
Thursday, April 5, 2012
Friday, September 23, 2011
CasaSugar's Weekend DIY
Another Friday, another great group of fun crafts for the weekend.
My big project for the weekend is to make a bed for our new doggie! I am going to take two older pillows that we don't use, and measure them for a cover. The plan is to use velcro on one end, so that it can easily be taken apart and washed. I plan on hitting up the discount fabric section of my local JoAnns & getting something comfy for our newest addition:

Here are some other project that everyone can try out this weekend. Some of these I personally plan on doing as well!
1. Embroidered Portraits
2. Make a frame for your simple mirror
3. Make your own Missoni Throw - which I have already linked on my Pintrest
4. A dye-dipped basket shade
5. Stencil your upholstery
6. "Cross-stitch" your Glasswares! I pinned this & will be doing this in some fashion. LOVE!
7. Make your own Wood Cutting Boards
Check out the links to all of these crafts on CasaSugar
Check out my Pintrest Account HERE
And, most importantly, have a super weekend of DIY!
Wednesday, September 21, 2011
Overview: How we Save Money
While Matt has been finishing up school (one year left, yay!) and I have been working at a job, where the status of whether we are going to get a paycheck or not changes weekly, we have had to be very careful with our money. This has changed how we live drastically. Before, when we "needed" something, we just bought it, but we haven't been able to operate that way for a while. And, because we are eeking ever so closely to 3 years in our current financial situation, I thought I might let everyone in on a few of our tips on how we save money every month.
First, I can not overlook the fact that we have amazing families. We were given a vehicle, and were given money for Christmas the past few years, which has helped drastically. We also got a large tax return last year, being that Matt get's tax breaks for going back to school, and while I was on reduced salary, I was paying less in taxes. We also got married. Between those three items, we were able to put a little money away. Of course there are always things that pop up - repairs on the older vehicle, dental work, hospital visits, home repair, tuition... lots of things that nip away at that little savings egg. But I wanted to share how we make the paycheck work on a weekly basis.
Our House Payment:
Four and a half yeas ago, when we were looking to buy a house, we decided to go for a more affordable home. When we started looking, we were both working, but decided to make sure we weren't spending more per month on a mortgage than we could afford with only one of us being employed. This has turned out to be a huge help.
We set up an account at the bank that holds our mortgage. We have direct deposit set up for our home account, where it withdraws money from payroll, then the bank withdraws our mortgage payment each month from that account. This means that a set amount is taken out of my paycheck every two weeks - even on "extra paycheck" months. We also "round up" our mortgage payment amount, so every month a few extra dollars wind up in the account. So in the past four and a half years, we have saved up 6 mortgage payments. This is a huge help should I become unemployed at anytime.
Utilities:
To put it simply, in the summer we tend to sweat a bit more than average, and in the winter, we are a little colder than average! Because heating and cooling bills are our highest utility bills, they should be addressed. In the summer, we only turn on the air conditioning, when the temperature in the evening is too uncomfortable to sleep, and when we do turn it on, we only turn the temperature down to 78 or 79 degrees. Just enough to get rid of the humidity. We have multiple fans around the home to keep air moving, and screens on windows and doors in order to get good cross ventilation. In the winter we use a programmable thermostat that allows us to turn down the temperature when we are sleeping or away from the house for the day. We have the temperature at its higest in the evening, when we are downstairs hanging out between dinner and bedtime, and we keep all of those temperatures on the cool side - 58 while sleeping, 60 when we are at work/school, and anywhere from 62-64 when we are lounging. We also use heaters to provide extra warmth, have an electric blanket on the bed, and dress in warmer clothing to keep warm. There also tend to be lots of warm blankets sprinkled around the house for a chilling evening.
We have done other things TO our home to help cut costs of utilities. We made draft blockers for the bottom of all of the doors, and applied weatherstripping around the sides of all of the doors in our home. This does a great job of preventing drafts through the doors. We will plastic windows for now, but I am going to start making/ buying thermal window treatments to make sure that the cold air coming through the glass of the windows doesn't make it into the room. We made a heavy-weight curtain and placed it at the bottom of the stairs, so that the warm air does not escape up to the second floor, the attic and out of the roof. We went around the house, and caulked any open joints to prevent cold air from spilling into the walls.
One thing we intend to do, when we remove the carpeting, is to seal the joint between the baseboards and the floor, as the cold that makes it's way into the walls, spills out onto the floor through these openings. We keep the door to the basement closed, and leave the oven ajar after cooking to lend additional warmth to the downstairs living areas.
As far as other utilities are concerned, we take shorter showers, use the water collected in our dehumidifier in the basement to water our plants, use our cell phones for long distance calls rather than having a long distance plan on our phone, and settle for slower internet speed. Our only real splurge is on cable, but we record shows & movies, buy popcorn, and avoid having to go to the theater all that often! It does save some money.
Groceries:
I would NOT consider myself an "extreme coupon-er" but I do spent time clipping coupons. We get the Sunday paper for their ads & their coupons. We use coupons.com to get additional coupons. We also get some coupons as mailers that are sent to our home. Combining coupons with weekly deals saves us about $850 dollars a year (at least according to the bottom of our receipts it does). That is on average, about $16 dollars a week, or $64 a month of savings. In a future post I will go into more detail about my couponing & meal planning, and how we save money doing this.
We shop at a grocery store that has a lot of perks. They have a store card that gives you the weekly sales. For every $50 you spend in groceries, you get $.10 off per gallon of gas at their gas stations. Then when you buy gas, you can get discounts on their groceries. They might mark up their groceries a bit for this service, but I have shopped around a lot. The prices are NOT that different.
We also eat almost every meal at home. I pack a lunch every day, and we eat dinner at home every night. Matt purchases lunch on campus three days a week, but brings beverages and snacks with him. We traditionally spend about $160-$200 bi-monthly at the grocery store. This breaks down to $40-$50 per person, per week in groceries. Considering that is usually about 20 meals for me and 17 for Matt, that's pretty good in my opinion. It averages out to about $2-$3 per meal, including beverages.
We make things that you tend to find pre-packaged. This is a big one! Four veggie burgers are $4. That's a dollar a burger. I will go and buy beans, veggies, bread crumbs, eggs and other ingredients & make burgers that cost about $.40 per burger. Instead of buying already made burritos - family sized for $15 we buy flour tortillas, chicken, cheese, veggies, beans & salsa for a fraction of the price, make a large serving & freeze extras. These are great for lunches, quick dinners, or snacks later. This has saved us a LOT of money, plus we can control what goes into the food, no added sugar, salt or preservatives.
I also troll through Target, CVS, Walgreens & RiteAid ads looking for deals on toiletries. We get most of them when they are on sale at the grocery store because of the Fuel Perks, but occasionally you will find a pretty great deal elsewhere that you can't pass up. We try to keep a decent stock of paper products, toiletries, and canned/ jarred items on hand as well. Also, BUY GENERIC! Check out ingredients to make sure that they don't throw in a bunch of high fructose corn syrup or preservatives, but I have found that most generic brands are exactly the same as the name brand... sometimes rice is rice, regardless.
Shopping:

I try to stick with the following mantra: Don't buy anything if it's not on sale, or you don't have a coupon. We get mailings all the time for clothing stores, shoe stores, etc. and we try to wait to buy something until those coupons come. This goes for oil changes for the car, home improvement supplies, decor, linens, just about whatever I can get on sale, I will.
Getting the Sunday newspaper and the ads are helpful, but most stores have their weekly flyers on their websites as well. I also encourage you to sign up for email alerts at your favorite stores, you tend to get coupons in your email, especially around your birthday. We set up an email account where we just send all of those emails, so they don't clutter our regular inbox, but whenever we need something, we check in on that account.
To be honest, we haven't done a lot of shopping lately. We will wear our shoes until they are no longer wearable, take care of the clothes we have and only replace as necessary. Speaking personally, I have enough clothing, and while I might WANT a new dress, I don't need it. This has probably been MY hardest adjustment.
Decorating:
Seeing as how I really love to decorate and have a comfortable home, making room for decor in our budget is important to me, so I find a way to do it as cheaply as possible. And lets be honest, not everyone can live in an empty, boring house, you need some stuff. One of my favorite secrets, is finding some amazing sales & items at your local Craft store - a place that the average person tends not to know about. You can get beautiful things there at a fraction of the price from the local big box store. Go there first to look for vases, holiday decor, picture frames, and other misc. decorating supplies. I also received a sewing machine as a gift, so now I sew pillows, drapes, napkins, table runners and other simple things. Sometimes buying some fabric and thread is WAY cheaper than a finished item. I read a lot of blogs and try to DIY wall art, unique vases, and other items. Of course I weigh the expense of just buying an item vs. actually making it first. My next DIY projects are closet shelves and a couple dog beds!
I will only buy things on severe discount when it comes to decoration - I will never buy anything full price. I shop after the holidays for any decor for the following year, I shop the clearance aisles at my favorite stores, and I will not buy anything that doesn't already have a purpose - I quit buying things I like unless I know how and where it will be used.
Gifts:
When it comes to our gifts to each other, Matt & I have scaled back, and that's fine with me. My birthday is in November, and Matt's is in February. Christmas, Thanksgiving, and New Years are in between. So we decide to take a previously agreed upon sum of money and buy something that we need. Two years ago we got a couch, last year we got a new TV - this is our big splurge every year & it's a gift to US, so we don't waste a ton of money getting each other things that we THINK the other person wants.
When it comes to gifts for others, coupons, coupons and more coupons. Have a set budget of what you want to spend, and you can get more for your buck with coupons. Bed Bath & Beyond sends 20% off & $5 off coupons routinely & that store is MADE for gifts. Also, watch for times at Target, when you can buy a certain amount of items and get a free $5 gift card!
This whole process has taught me one thing, previous to our current financial situation, we spent TOO much money, and could have been saving more. We don't need every thing we want, we don't need a lot of stuff, fancy meals, fancy labels or the newest gadgets. Yes, it is bad when you need a new pair of shoes, and don't feel that you should really buy them, or you spend months trying to find the right shoe at the right price...which is trying and difficult. But I have learned that while all of life's conveniences are NICE, they aren't always necessary, and it's a lesson worth learning.
As we move forward out of this recession, and we are both gainfully employed, we will take the lessons we have learned and start saving. We will live in a more simple manner, and more economic way, and while we will upgrade the 15 year old car, and the cheaper house eventually, we will never live beyond our means. We will never spend like there will always be money, because we know now, that it is not always the case.
First, I can not overlook the fact that we have amazing families. We were given a vehicle, and were given money for Christmas the past few years, which has helped drastically. We also got a large tax return last year, being that Matt get's tax breaks for going back to school, and while I was on reduced salary, I was paying less in taxes. We also got married. Between those three items, we were able to put a little money away. Of course there are always things that pop up - repairs on the older vehicle, dental work, hospital visits, home repair, tuition... lots of things that nip away at that little savings egg. But I wanted to share how we make the paycheck work on a weekly basis.
Our House Payment:
| Photo Credit: Pixel Reborn |
Four and a half yeas ago, when we were looking to buy a house, we decided to go for a more affordable home. When we started looking, we were both working, but decided to make sure we weren't spending more per month on a mortgage than we could afford with only one of us being employed. This has turned out to be a huge help.
We set up an account at the bank that holds our mortgage. We have direct deposit set up for our home account, where it withdraws money from payroll, then the bank withdraws our mortgage payment each month from that account. This means that a set amount is taken out of my paycheck every two weeks - even on "extra paycheck" months. We also "round up" our mortgage payment amount, so every month a few extra dollars wind up in the account. So in the past four and a half years, we have saved up 6 mortgage payments. This is a huge help should I become unemployed at anytime.
Utilities:
 |
| Photo Credit: Here |
To put it simply, in the summer we tend to sweat a bit more than average, and in the winter, we are a little colder than average! Because heating and cooling bills are our highest utility bills, they should be addressed. In the summer, we only turn on the air conditioning, when the temperature in the evening is too uncomfortable to sleep, and when we do turn it on, we only turn the temperature down to 78 or 79 degrees. Just enough to get rid of the humidity. We have multiple fans around the home to keep air moving, and screens on windows and doors in order to get good cross ventilation. In the winter we use a programmable thermostat that allows us to turn down the temperature when we are sleeping or away from the house for the day. We have the temperature at its higest in the evening, when we are downstairs hanging out between dinner and bedtime, and we keep all of those temperatures on the cool side - 58 while sleeping, 60 when we are at work/school, and anywhere from 62-64 when we are lounging. We also use heaters to provide extra warmth, have an electric blanket on the bed, and dress in warmer clothing to keep warm. There also tend to be lots of warm blankets sprinkled around the house for a chilling evening.
We have done other things TO our home to help cut costs of utilities. We made draft blockers for the bottom of all of the doors, and applied weatherstripping around the sides of all of the doors in our home. This does a great job of preventing drafts through the doors. We will plastic windows for now, but I am going to start making/ buying thermal window treatments to make sure that the cold air coming through the glass of the windows doesn't make it into the room. We made a heavy-weight curtain and placed it at the bottom of the stairs, so that the warm air does not escape up to the second floor, the attic and out of the roof. We went around the house, and caulked any open joints to prevent cold air from spilling into the walls.
One thing we intend to do, when we remove the carpeting, is to seal the joint between the baseboards and the floor, as the cold that makes it's way into the walls, spills out onto the floor through these openings. We keep the door to the basement closed, and leave the oven ajar after cooking to lend additional warmth to the downstairs living areas.
As far as other utilities are concerned, we take shorter showers, use the water collected in our dehumidifier in the basement to water our plants, use our cell phones for long distance calls rather than having a long distance plan on our phone, and settle for slower internet speed. Our only real splurge is on cable, but we record shows & movies, buy popcorn, and avoid having to go to the theater all that often! It does save some money.
Groceries:
 |
| Photo Credit: Here |
I would NOT consider myself an "extreme coupon-er" but I do spent time clipping coupons. We get the Sunday paper for their ads & their coupons. We use coupons.com to get additional coupons. We also get some coupons as mailers that are sent to our home. Combining coupons with weekly deals saves us about $850 dollars a year (at least according to the bottom of our receipts it does). That is on average, about $16 dollars a week, or $64 a month of savings. In a future post I will go into more detail about my couponing & meal planning, and how we save money doing this.
We shop at a grocery store that has a lot of perks. They have a store card that gives you the weekly sales. For every $50 you spend in groceries, you get $.10 off per gallon of gas at their gas stations. Then when you buy gas, you can get discounts on their groceries. They might mark up their groceries a bit for this service, but I have shopped around a lot. The prices are NOT that different.
We also eat almost every meal at home. I pack a lunch every day, and we eat dinner at home every night. Matt purchases lunch on campus three days a week, but brings beverages and snacks with him. We traditionally spend about $160-$200 bi-monthly at the grocery store. This breaks down to $40-$50 per person, per week in groceries. Considering that is usually about 20 meals for me and 17 for Matt, that's pretty good in my opinion. It averages out to about $2-$3 per meal, including beverages.
We make things that you tend to find pre-packaged. This is a big one! Four veggie burgers are $4. That's a dollar a burger. I will go and buy beans, veggies, bread crumbs, eggs and other ingredients & make burgers that cost about $.40 per burger. Instead of buying already made burritos - family sized for $15 we buy flour tortillas, chicken, cheese, veggies, beans & salsa for a fraction of the price, make a large serving & freeze extras. These are great for lunches, quick dinners, or snacks later. This has saved us a LOT of money, plus we can control what goes into the food, no added sugar, salt or preservatives.
I also troll through Target, CVS, Walgreens & RiteAid ads looking for deals on toiletries. We get most of them when they are on sale at the grocery store because of the Fuel Perks, but occasionally you will find a pretty great deal elsewhere that you can't pass up. We try to keep a decent stock of paper products, toiletries, and canned/ jarred items on hand as well. Also, BUY GENERIC! Check out ingredients to make sure that they don't throw in a bunch of high fructose corn syrup or preservatives, but I have found that most generic brands are exactly the same as the name brand... sometimes rice is rice, regardless.
Shopping:

I try to stick with the following mantra: Don't buy anything if it's not on sale, or you don't have a coupon. We get mailings all the time for clothing stores, shoe stores, etc. and we try to wait to buy something until those coupons come. This goes for oil changes for the car, home improvement supplies, decor, linens, just about whatever I can get on sale, I will.
Getting the Sunday newspaper and the ads are helpful, but most stores have their weekly flyers on their websites as well. I also encourage you to sign up for email alerts at your favorite stores, you tend to get coupons in your email, especially around your birthday. We set up an email account where we just send all of those emails, so they don't clutter our regular inbox, but whenever we need something, we check in on that account.
To be honest, we haven't done a lot of shopping lately. We will wear our shoes until they are no longer wearable, take care of the clothes we have and only replace as necessary. Speaking personally, I have enough clothing, and while I might WANT a new dress, I don't need it. This has probably been MY hardest adjustment.
Decorating:
 |
| Photo Credit: Here |
Seeing as how I really love to decorate and have a comfortable home, making room for decor in our budget is important to me, so I find a way to do it as cheaply as possible. And lets be honest, not everyone can live in an empty, boring house, you need some stuff. One of my favorite secrets, is finding some amazing sales & items at your local Craft store - a place that the average person tends not to know about. You can get beautiful things there at a fraction of the price from the local big box store. Go there first to look for vases, holiday decor, picture frames, and other misc. decorating supplies. I also received a sewing machine as a gift, so now I sew pillows, drapes, napkins, table runners and other simple things. Sometimes buying some fabric and thread is WAY cheaper than a finished item. I read a lot of blogs and try to DIY wall art, unique vases, and other items. Of course I weigh the expense of just buying an item vs. actually making it first. My next DIY projects are closet shelves and a couple dog beds!
I will only buy things on severe discount when it comes to decoration - I will never buy anything full price. I shop after the holidays for any decor for the following year, I shop the clearance aisles at my favorite stores, and I will not buy anything that doesn't already have a purpose - I quit buying things I like unless I know how and where it will be used.
Gifts:
 |
| Photo Credit: Here |
When it comes to our gifts to each other, Matt & I have scaled back, and that's fine with me. My birthday is in November, and Matt's is in February. Christmas, Thanksgiving, and New Years are in between. So we decide to take a previously agreed upon sum of money and buy something that we need. Two years ago we got a couch, last year we got a new TV - this is our big splurge every year & it's a gift to US, so we don't waste a ton of money getting each other things that we THINK the other person wants.
When it comes to gifts for others, coupons, coupons and more coupons. Have a set budget of what you want to spend, and you can get more for your buck with coupons. Bed Bath & Beyond sends 20% off & $5 off coupons routinely & that store is MADE for gifts. Also, watch for times at Target, when you can buy a certain amount of items and get a free $5 gift card!
This whole process has taught me one thing, previous to our current financial situation, we spent TOO much money, and could have been saving more. We don't need every thing we want, we don't need a lot of stuff, fancy meals, fancy labels or the newest gadgets. Yes, it is bad when you need a new pair of shoes, and don't feel that you should really buy them, or you spend months trying to find the right shoe at the right price...which is trying and difficult. But I have learned that while all of life's conveniences are NICE, they aren't always necessary, and it's a lesson worth learning.
As we move forward out of this recession, and we are both gainfully employed, we will take the lessons we have learned and start saving. We will live in a more simple manner, and more economic way, and while we will upgrade the 15 year old car, and the cheaper house eventually, we will never live beyond our means. We will never spend like there will always be money, because we know now, that it is not always the case.
Wednesday, August 31, 2011
The Making of the Lists
Hello Everyone. It's been a while since I have checked in. We have been going through some financial issues lately, which unfortunately has made me shy away from the blog. We have windows to fix, teeth to fix, house parts to fix & a new semester of college for my husband - which now that we are married, he gets FAR less financial assistance.
So we have been living pretty tight lately, forcing me to put a lot of projects on the shelf. I haven't wanted to spend the money. So what I wanted to do last night was to sit down, and put together a list of things to do to the house. Because I am the queen of lists, it helped me to organize my thoughts, and also to start having something to "check" things off of. While the list is overwhelming, there are certain things that we can start doing to check off the list, that have little or no cost associated with them.
So I decided that I wanted to take the list public - make myself start accomplishing things, so that our house can get "done", so that we have something to enjoy for the next few years, while we start to squirrel away pennies to save for our dream house.
I also want to start getting into showing everyone how we are doing things on a budget, how we are saving money, so that all those other people out there, who are struggling to make ends meet, can see that there is a way to achieve your goals without spending a lot of money.
But now we must get on to the good stuff...
THE LIST
The Living Room

1. Pull up the carpet
2. Refinish the floors (if required)
3. Make sliding "c" end tables
4. Hang artwork/photos
5. New Lamps
6. Refinish end tables
7. Rug(s)
8. Reorganize shelves on either side of fireplace
9. Silicone/caulk joint between baseboard & floor, once exposed
10. Acquire bookcase with glass doors to store movies
11. Clean out fireplace
12. Make Birch candles for fireplace (as seen HERE)
13. Find better location for Game Board & organize coffee table
14. Build second shelf in coat closet (above existing shelf)
15. Organize coat closet - making room for vacuums & shoes!
16. Purge old coats
17. Buy new large plant for room
The Dining Room

1. Pull up carpet
2. Refinish floors (if required)
3. Fix broken sash cord in window
4. Repaint trim after window repair
5. Silicone/caulk joint at baseboard & floor, once exposed.
6. Make new burlap table runner
The Kitchen

1. New Flooring - Rubberized Vinyl Sheet Flooring (with stamped tile pattern)
2. New Countertops (decide material)
3. Matching Pulls/Knobs for all cabinet doors
4. New Dishwasher
5. New Fridge (it will die in the not too distant future - better put it on the list!)
6. Smaller Microwave, maybe even one that can be mounted over the stove to give more counter space
7. Bench for mudroom
8. Window treatment for back door
9. Paint back door
The Half Bath

1. New shoe mold @ tile
2. Fix broken tiles (we are having an issue where the floor is moving a bit too much. It cracked two of our tiles under the toilet. We aren't going to fix it now, because it isn't obvious, but we will have to fix it eventually)
3. Finish attaching sink to wall with longer screw & silicone around edge of sink bowl.
4. Artwork & Baskets to finish decorating
The Third Bedroom
(I don't have an image for this room, but will edit it soon with a picture. This room is now our closet, but will eventually be a nursery, when we decide to have kids)
1. Pull up carpet
2. Refinish floors (as required)
3. Rug
4. Paint walls & trim
5. Silicone/caulk joint at baseboards & floor
6. Remove closet door & build two shelves above rod (the closet door is right behind the entry door - too many doors in such a little space)
7. Make curtains for 2 windows & closet door
8. New Furniture
9. Fix Broken window & dropped sash
Guest Bedroom
(Again, no photo here, and not a lot of work to do)
1. Pull up carpet
2. Refinish floors (as required)
3. Rug
4. Paint walls & trim
5. Silicone/caulk joint at baseboards & floor
6. New curtains for two windows
Master Bedroom

(Not a great picture, but it gives you an idea. Ignore the sheets - we need new sheets, in fact, lets make that number 1, shall we?)
1. New Sheets!
2. Pull up carpet
3. Refinish floors (as required)
4. Rugs - including maybe making a couple of t-shirt rugs (example HERE)!
5. Silicone/caulk joint at baseboard & floor
6. New Wardrobe, like the one seen HERE at IKEA
7. New bench @ window
8. Finish building nightstand, paint
9. Decorate nightstands
10. Enlarge existing closet opening & case opening
11. Make new curtains for 2 windows & closet (closet curtains are temporary)
12. New bi-fold closet doors
13. Fix broken window & dropped sash
Hallway
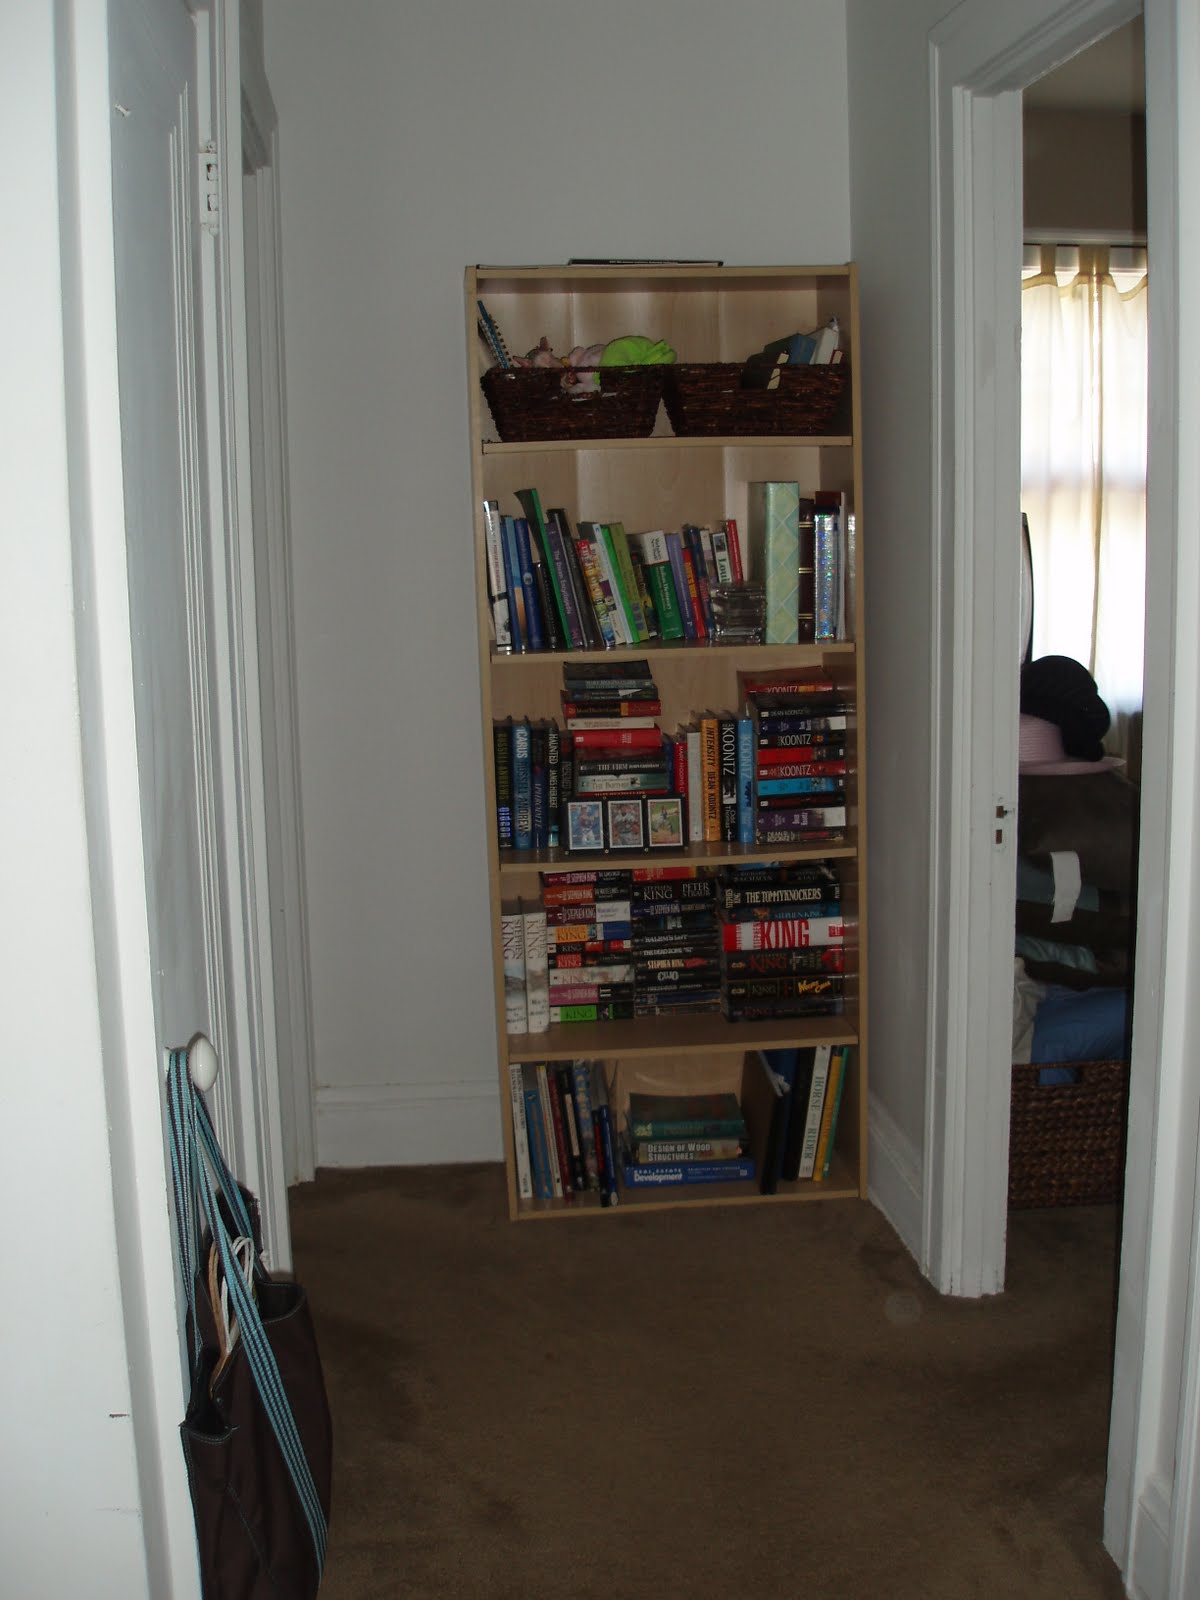
1. Pull up carpet
2. Refinish floors (as required)
3. Rug
4. Paint walls & trim
5. Silicone/caulk joint at baseboards & floor
6. New bookshelf
7. Photo Wall
Outside

1. Paint railings at front porch
2. Paint porch floor
3. Replace any warped porch pieces (all three porches)
4. Repair damaged siding on garage
5. Paint garage
6. Finish cleaning up the planting beds & move plants around
7. Patch issue in roof over mudroom
8. Table for front porch & back patio
This is the bulk of the work that we'd like to do. Eventually, we'd like to put baseboard heaters in the finished attic space, so that it can technically be called a bedroom. We also have some cleaning and organizing to do in the basement. But that is our list. Daunting, no?
The goal will be to start going room to room & crossing things off. Unfortunately because my mind is always working, a few things might get added too.
Hopefully we can get started on some of the easier ones first. Like pulling up the carpet in the bedrooms - where the floor doesn't have to look perfect right away. I would really like to get started in our bedroom, since there is quite a bit of work to do there. We'll see what happens next!
Wednesday, July 20, 2011
A Little Curb Appeal
Admittedly, our yard has gotten a little out of control. The sod, and the weeds are literally destroying any type of "planting bed" that we have in our yard. This is in all beds, one in the front, one along the side and two in the back. So we decided that we would take care of this issue in stages... one bed at a time. And because our front yard is the one that most people see, it's the one that we decided to tackle first.
Here is what the bed looked like at the beginning of this quest:
 |
| Note that there is no visible boundary between the yard and the bed... |
Where is the bed exactly?, you ask... well it is just in front of the two trees, has a bit of a bend to it, and currently has hostas & lilies between it. Impossible to tell, I know. So Matt and I set to work to fix this issue. Of course by 9am when we started, it was already in the low 80's, so conditions weren't exactly ideal, but we worked our butts off - and I mean that quite literally.
I used the shovel seen in this photo, and Matt used a pick axe (which was by far the superior tool) to make this bed better. I scooped out the perimeter with the shovel, and then we went to work removing the sod and the weeds.
First problem that we encountered, this bed is filled with rocks, from where, I don't know, but the axe helped a lot in this area. Second problem, we dug up somewhere in the neighborhood of 30 small bulbs, most of which I expect are either grape hyacinths or crocuses... Problem number three was that it became very clear that previous to this layout that we inherited, there was a great deal of ground cover in this area, as we encountered a TON of spidery roots just under the surface. I was annoyed that the bulbs were planted so close to the surface, as I'm pretty sure I pulled up a few daffodil bulbs as well, and quickly replaced them. I am planning, once the weather has cooled to throw the small bulbs back in the ground and see what happens in the spring!
Our goal was to create a completely manageable, and cheaper "trench bed", where no landscaping border was required, and no edging of the lawn would be required. This will make the upkeep of this area much easier for us. It also made the project cheaper as bricks, wood, or any other misc. landscaping border techniques can add considerable cost to your project.
To do this we made a very clear line between the grass and the dirt, digging down around 3 inches to make an obvious distinction. After we removed the sod and weeds and tilled the soil a bit, we added two bags of hummus and 8 bags of topsoil to the bed. We mixed the new soil in with the old, and mounded it up toward the back, maintaining a "trench" at the front. This makes it easy to prevent over watering, it also allows you to put the wheel of the lawn mower here for easy trimming.
So after several hours, the use of dozens of tools from our garage, 10 bags of dirt & at least 4 water bottles full of ice water, this is what we had done (note that the shadow of the trees make it harder to see):


You can see an edge, and even dirt! Where before all you saw were weeds and grass. And there is an extra shot of the trench so you can see our plan. Next year we will plan what we want to plant where. I think adding a little color under the burning bushes is necessary, however it has to be something that complements the bright red color that they will become in the next few months!
I am happy with the change, and looking forward to working on all the other beds in the yard!
What curb appeal changes have you been making to your homes?
Friday, July 8, 2011
CasaSugar's Weekend DIY
Welcome back to getting on track and getting over some of the craziest busy summer ever! I'd like to take a break in my crazy week, and subsequent weekend to bring you Casa Sugar's Weekend DIY. I always love the projects, so I thought I'd get back to posting them for you all again!
This week's projects:
1. DIY Photo Booth
2. Nautical Napkin Rings
3. Wall Art with Office Supplies
4. Make Your Own Rug (picture and link above)
5. Frame and Hang Bandanas for a Punch of Color
After this weekend some of the busy will wear down and we can get back to work on our own house! Our list of summer projects is building up, but the number of weeks to get it done is getting smaller! Here is our list:
Fix & Clean up Planting beds & add peat moss
Scrape, Sand & Paint porch railing, columns & balusters
Replace portions of garage wall & paint garage
Fix portions of old railing on two porches
And new, as of this weekend: Fix leak in roof over mudroom!
Needless to say we will be busy, but if you are looking for something to do, check out the projects above. Here is the link for Casa's Weekend DIY
Here you will see all the projects, find all the links & see all of the photos.
Have a great weekend everyone!
 | ||
| DIY Rug! Find all the details HERE |
This week's projects:
1. DIY Photo Booth
2. Nautical Napkin Rings
3. Wall Art with Office Supplies
4. Make Your Own Rug (picture and link above)
5. Frame and Hang Bandanas for a Punch of Color
After this weekend some of the busy will wear down and we can get back to work on our own house! Our list of summer projects is building up, but the number of weeks to get it done is getting smaller! Here is our list:
Fix & Clean up Planting beds & add peat moss
Scrape, Sand & Paint porch railing, columns & balusters
Replace portions of garage wall & paint garage
Fix portions of old railing on two porches
And new, as of this weekend: Fix leak in roof over mudroom!
Needless to say we will be busy, but if you are looking for something to do, check out the projects above. Here is the link for Casa's Weekend DIY
Here you will see all the projects, find all the links & see all of the photos.
Have a great weekend everyone!
Subscribe to:
Posts (Atom)